Usage
Learn how to use REST Client Next to send HTTP requests and view responses.
Basic Usage
Sending a Request
 Demo: Sending a request and viewing response
- Create or open a file with
.httpor.restextension (or any file and set language mode toHTTP) in Visual Studio Code - Type your HTTP request
- Use one of these methods to send:
- Click
Send Requestlink above the request - Press
Ctrl+Alt+R(Cmd+Alt+Ron macOS) - Right-click in the editor and select
Send Request - Press
F1and typeRest Client: Send Request
- Click
The response will appear in a separate preview panel.
Request Structure
Request Line
The first non-empty line is the Request Line. Examples:
GET https://example.com/comments/1 HTTP/1.1
GET https://example.com/comments/1
https://example.com/comments/1
If the method is omitted, GET is assumed.
Query Strings
You can include query parameters in the request line:
GET https://example.com/comments?page=2&pageSize=10
For better readability, you can spread parameters across multiple lines:
GET https://example.com/comments
    ?page=2
    &pageSize=10
Request Headers
Headers follow the request line until the first empty line, using field-name: field-value format:
User-Agent: rest-client
Accept-Language: en-GB,en-US;q=0.8,en;q=0.6,zh-CN;q=0.4
Content-Type: application/json
A default User-Agent: vscode-restclient is added if not specified. Customize via rest-client.defaultHeaders setting.
Tes CORS by setting an Origin: header.
Request Body
Add a blank line after headers, then include the body:
POST https://example.com/comments HTTP/1.1
Content-Type: application/json
Origin: https://example.com

{
    "name": "sample",
    "time": "Wed, 21 Oct 2015 18:27:50 GMT"
}
Using Files as Body
Reference a file with < followed by the path (absolute or relative):
POST https://example.com/comments HTTP/1.1
Content-Type: application/xml

< ./request.xml
For variable processing in the file, use @ before the path:
<@ ./request.xml
Override encoding:
<@latin1 ./request.xml
multipart/form-data
POST https://api.example.com/user/upload
Content-Type: multipart/form-data; boundary=----WebKitFormBoundary7MA4YWxkTrZu0gW

------WebKitFormBoundary7MA4YWxkTrZu0gW
Content-Disposition: form-data; name="text"

title
------WebKitFormBoundary7MA4YWxkTrZu0gW
Content-Disposition: form-data; name="image"; filename="1.png"
Content-Type: image/png

< ./1.png
------WebKitFormBoundary7MA4YWxkTrZu0gW--
application/x-www-form-urlencoded
POST https://api.example.com/login HTTP/1.1
Content-Type: application/x-www-form-urlencoded

name=foo
&password=bar
Tip: Ctrl/Cmd + Click on a document link to open the file in a new tab.
Per-Request Settings in Code
Add special comments (metadata directives) before a request to modify its behavior. These include:
@name- Name the request for cross-referencing@prompt- Prompt for user input@set- Extract response values to variables@note- Show confirmation dialog@no-redirect- Disable redirect following@no-cookie-jar- Disable cookie handling
For detailed documentation, examples, and best practices, see Metadata Directives.
###
# @name first
GET https://api.example.com/user

###
# @note This A Note
POST https://api.example.com/login HTTP/1.1
Content-Type: application/x-www-form-urlencoded

name={{ first.response.body.$.name }}
&password=bar
Multiple Requests in One File
Separate requests with three or more consecutive # symbols:
GET https://example.com/comments/1 HTTP/1.1

###

GET https://example.com/topics/1 HTTP/1.1

###

POST https://example.com/comments HTTP/1.1
Content-Type: application/json

{
    "name": "sample"
}
Place your cursor within a request block and send it. You can also select specific text to send only that portion.
Making GraphQL Requests
Add header X-Request-Type: graphql and include the query and optional variables:
POST https://api.github.com/graphql
Content-Type: application/json
Authorization: Bearer xxx
X-REQUEST-TYPE: graphql

query ($name: String!, $owner: String!) {
  repository(name: $name, owner: $owner) {
    name
  }
}

{
    "name": "vscode-restclient",
    "owner": "Huachao"
}
Note: Blank line between query and variables.
Making cURL Requests
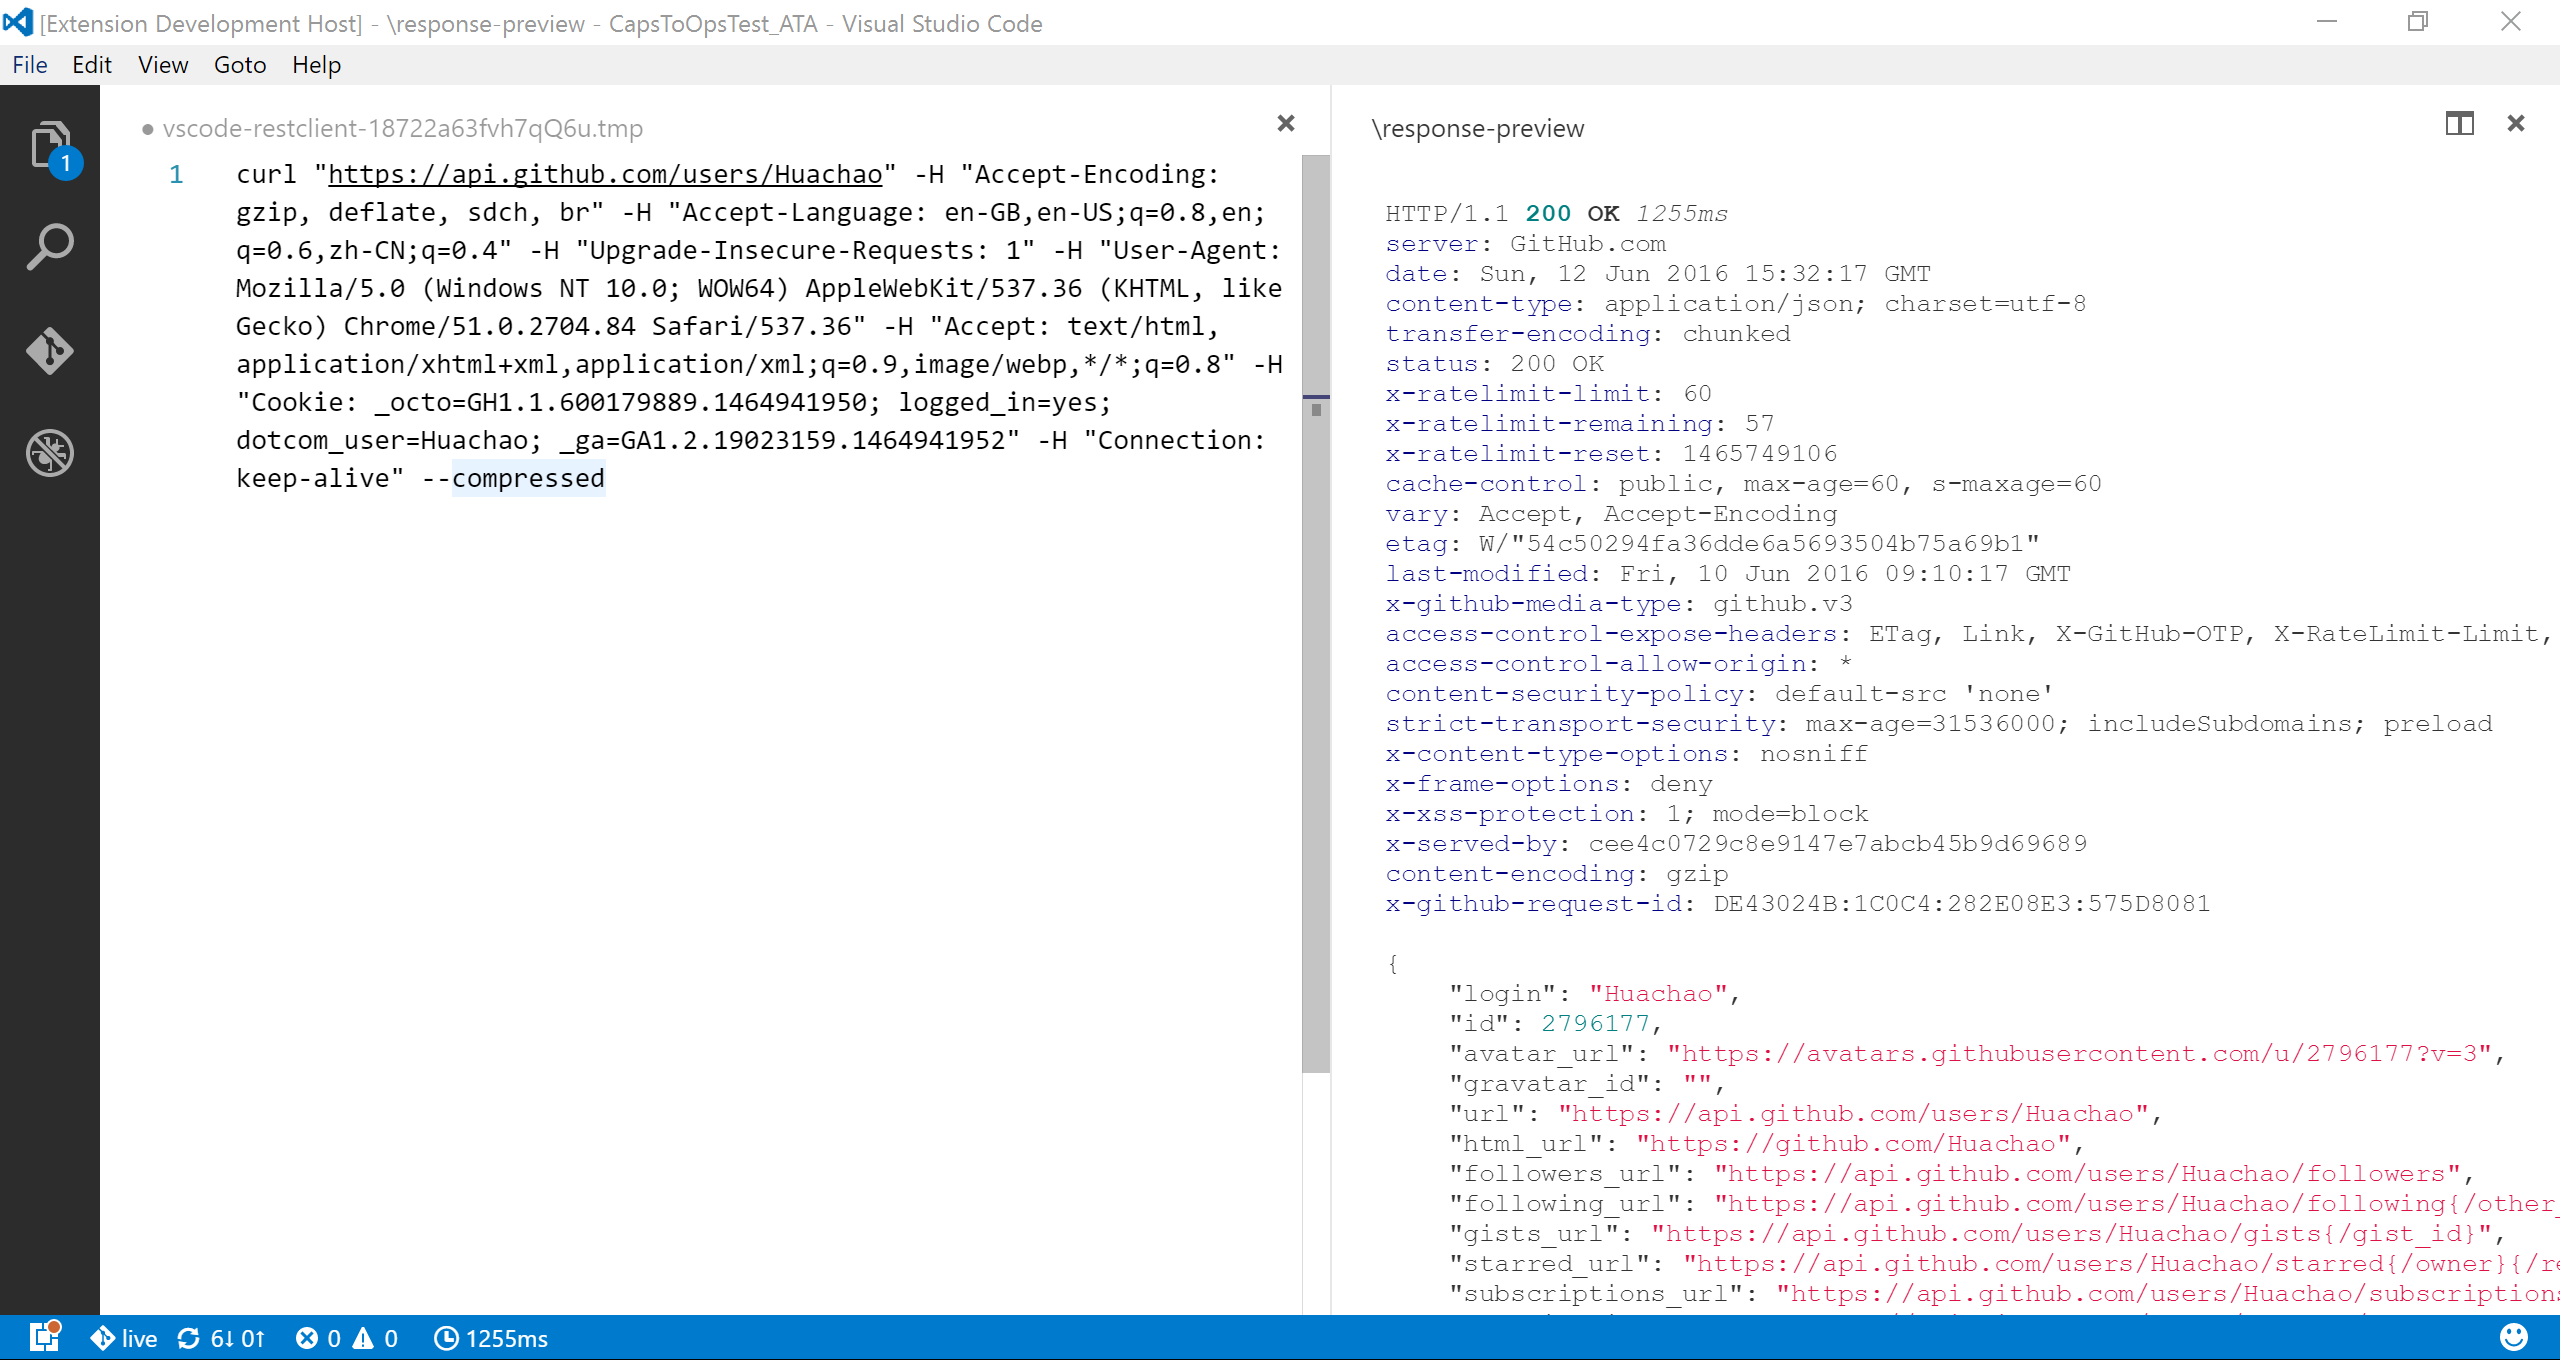 Writing a cURL request in the editor
Simply write a cURL command in the editor:
curl -X POST https://example.com/api \
  -H "Content-Type: application/json" \
  -d '{"key":"value"}'
The extension will parse and execute it. Supported options: -X, -L, -H, -I, -b, -u, -d.
Request Operations
Cancel Request
- Click the spinning icon in the status bar
- Press
Ctrl+Alt+K(Cmd+Alt+Kon macOS) - Use command palette:
Rest Client: Cancel Request
Rerun Last Request
- Press
Ctrl+Alt+L(Cmd+Alt+Lon macOS) - Command palette:
Rest Client: Rerun Last Request
Select Request Text
You can select any portion of text in the editor and send it as a request. Useful for sending just part of a larger file.
Response Preview
Responses appear in a separate webview panel with:
- Syntax highlighting for body content
- Status line and headers
- Image display for image responses
- Fold/Unfold controls for large bodies
Response Preview Options
Change via rest-client.previewOption setting:
full- Complete response (default)headers- Headers onlybody- Body onlyexchange- Both request and response
Saving Responses
- Save Full Response - Saves headers + body to file
- Save Response Body - Saves only body with appropriate extension
Click the respective icons in the response preview tab title bar.
 Save full response or response body only
Viewing Response Details
Hover over status bar indicators:
- Duration - Breakdown: Socket, DNS, TCP, First Byte, Download
- Size - Breakdown: headers and body sizes
Request History
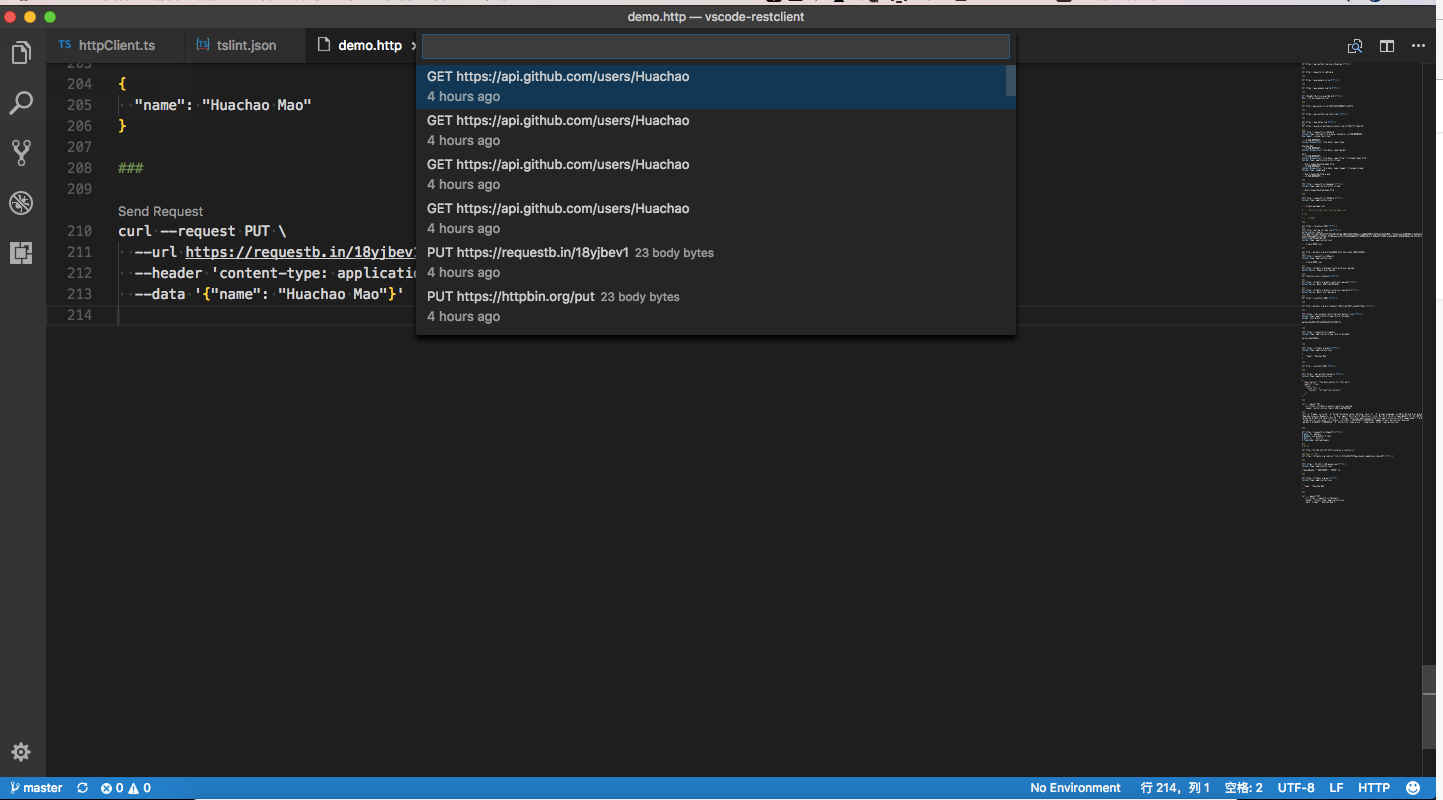 Viewing request history
Every sent request is automatically saved. Access via:
Ctrl+Alt+H(Cmd+Alt+Hon macOS)- Command palette:
Rest Client: Request History
View last 50 requests (most recent first). Select one to see its details in a temp file. Re-send by sending from that temp file.
Clear history with Rest Client: Clear Request History.
Code Snippets
 Generating code snippets in various languages
Generate code snippets for your request in various languages:
Ctrl+Alt+C(Cmd+Alt+Con macOS)- Command palette:
Rest Client: Generate Code Snippet - Right-click context menu:
Generate Code Snippet
Select from supported languages and libraries; generated code appears in a preview panel. Copy to clipboard with the copy icon.
Keyboard Shortcuts
| Action | Windows/Linux | macOS |
|---|---|---|
| Send Request | Ctrl+Alt+R |
Cmd+Alt+R |
| Cancel Request | Ctrl+Alt+K |
Cmd+Alt+K |
| Rerun Last Request | Ctrl+Alt+L |
Cmd+Alt+L |
| Request History | Ctrl+Alt+H |
Cmd+Alt+H |
| Switch Environment | Ctrl+Alt+E |
Cmd+Alt+E |
| Copy Request as cURL | Ctrl+Alt+C |
Cmd+Alt+C |
| Generate Code Snippet | Ctrl+Alt+C |
Cmd+Alt+C |
Note: Shortcuts work exclusively when file language mode is
HTTPorplaintext.